How Can We Help?
How to Configure Easy Multi Display?
Using EMD is easy but if you want to know how to configure the Easy Multi Display, please read this article. There are three icons which help you complete different operations in EMD.
Setting EMDisplay | Start EMDisplay | Stop EMDisplay |
|---|---|---|
This is the display wizard which guides you through setting up your displays. | This allows you to start the last memorized configuration without launching the display wizard. | This allows you to stop the last memorized configuration without launching the display wizard. |
Using the EMD Wizard to Configure your displays
STEP 1
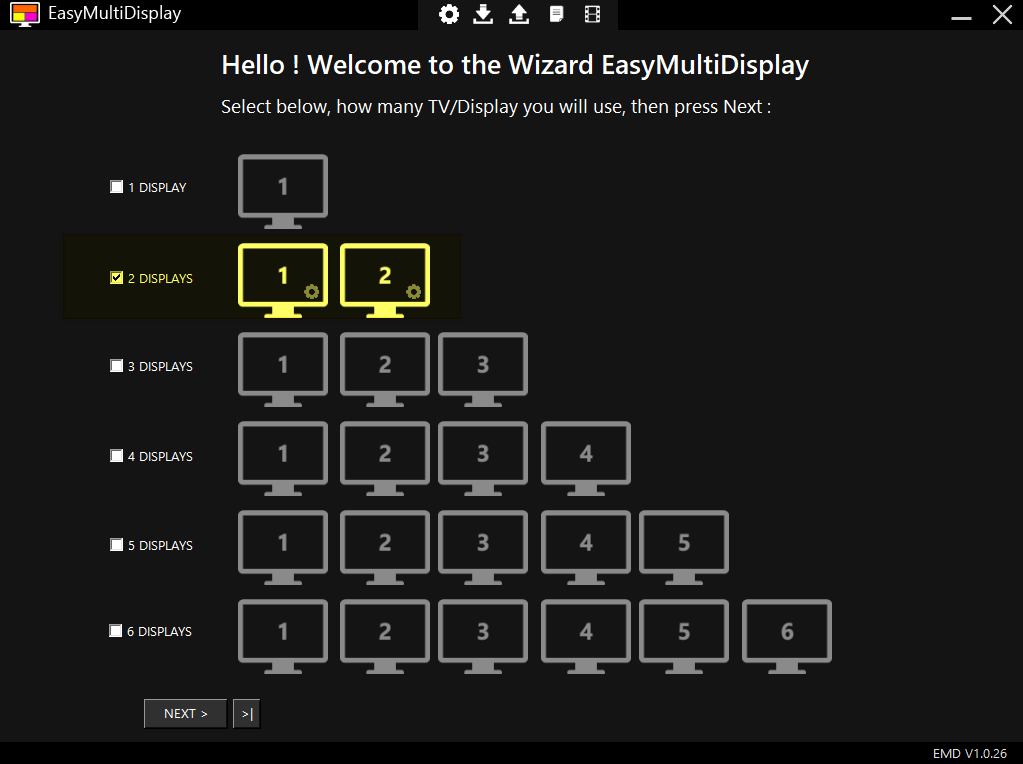
Launch the Easy Multi Display Wizard by double clicking the Setting EMDisplay icon on your desktop.
Select the number of TV Screens or Monitors or other kinds of displays that you will use, then click Next. In this example, I will configure two monitors.
STEP 2
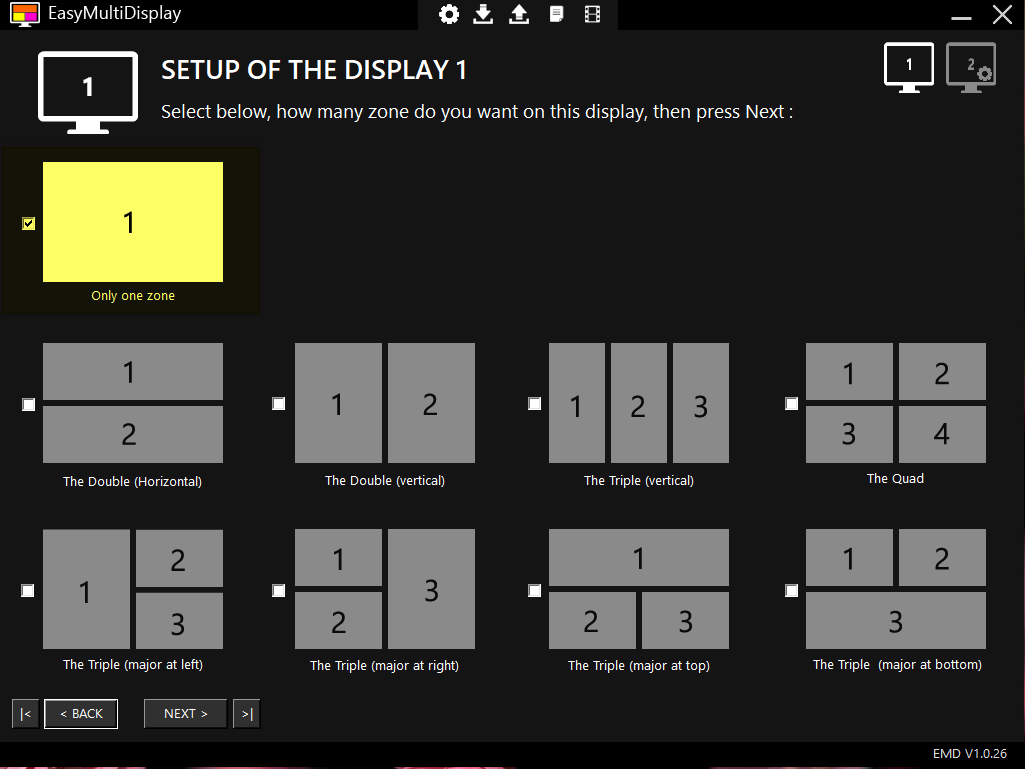
Now you will decide what kind of zone layout you would like to display on Display 1, then click Next.
In this example, I have chosen to display only one zone, on display 1.
STEP 3
Now you can define what specifically you would like to be shown on Display 1. You can choose either a URL, OR media for each zone.


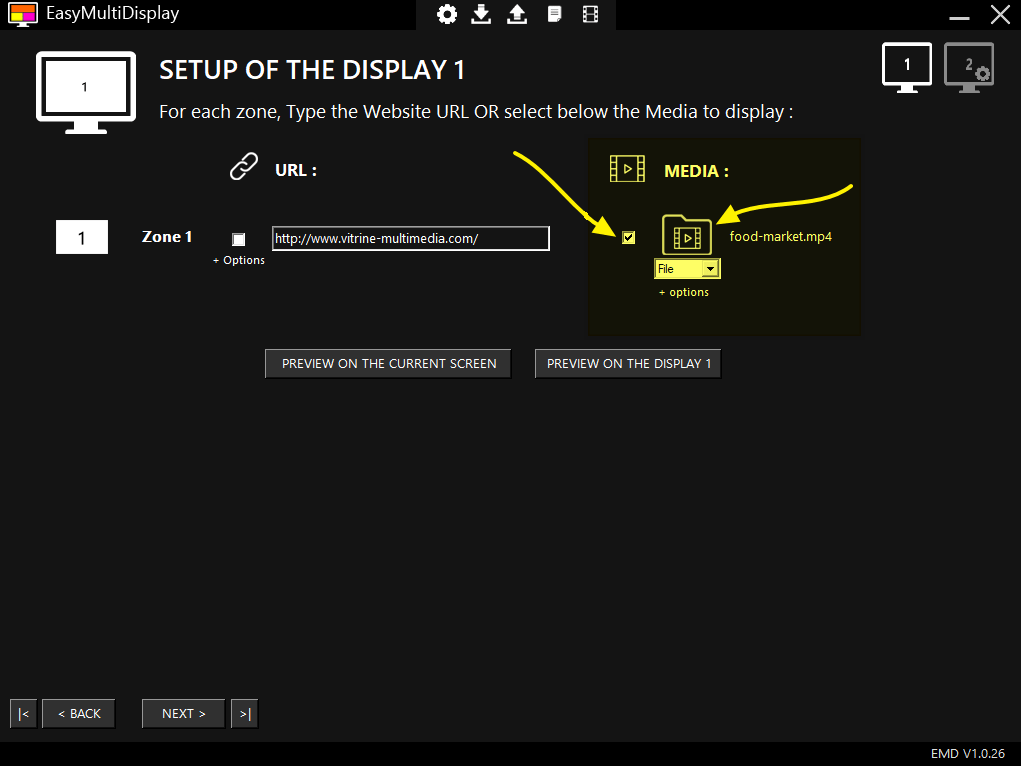
To display a Website: Simply select the checkbox next to the URL and enter your own URL.
To display a video or image file: Simply select the checkbox next to the Media icon, then click on the folder to select your media.
In this example, I have chosen to display a single video titled food market.mp4
You can preview your selection on your current monitor or on Display 1 so that you are sure you have the correct settings. When you are happy with your first display configuration, click Next.
STEP 4
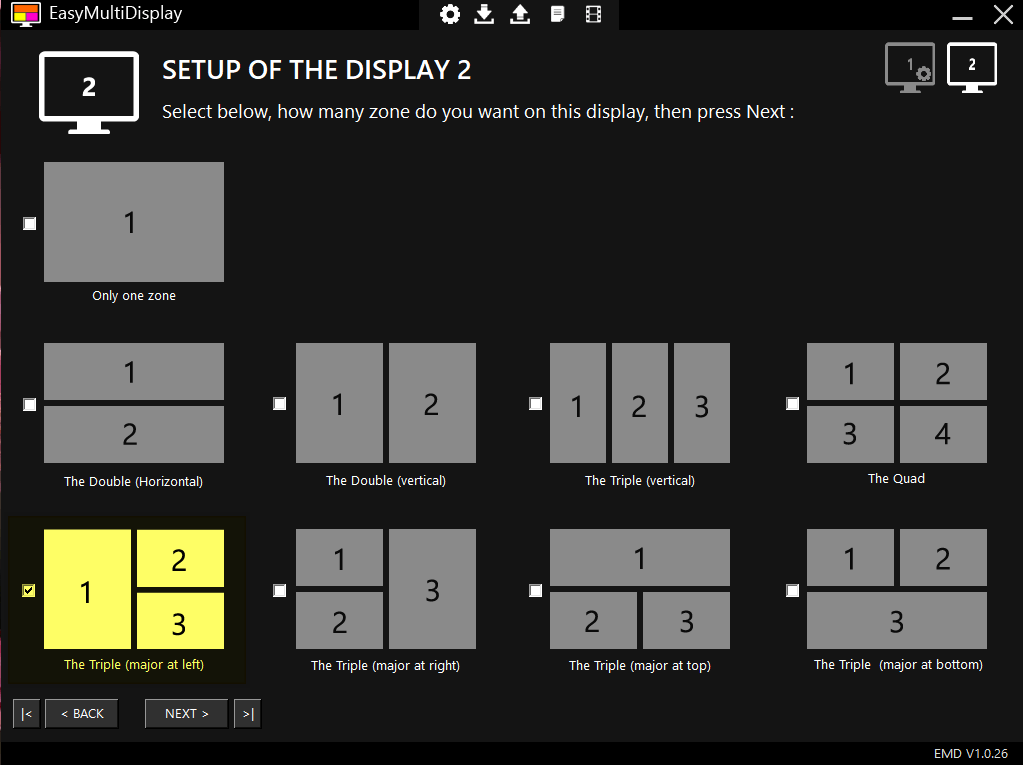
Now you you can select the number of zones for your second display, then click Next.
In this example, I will display three different zones on my second display.
STEP 5
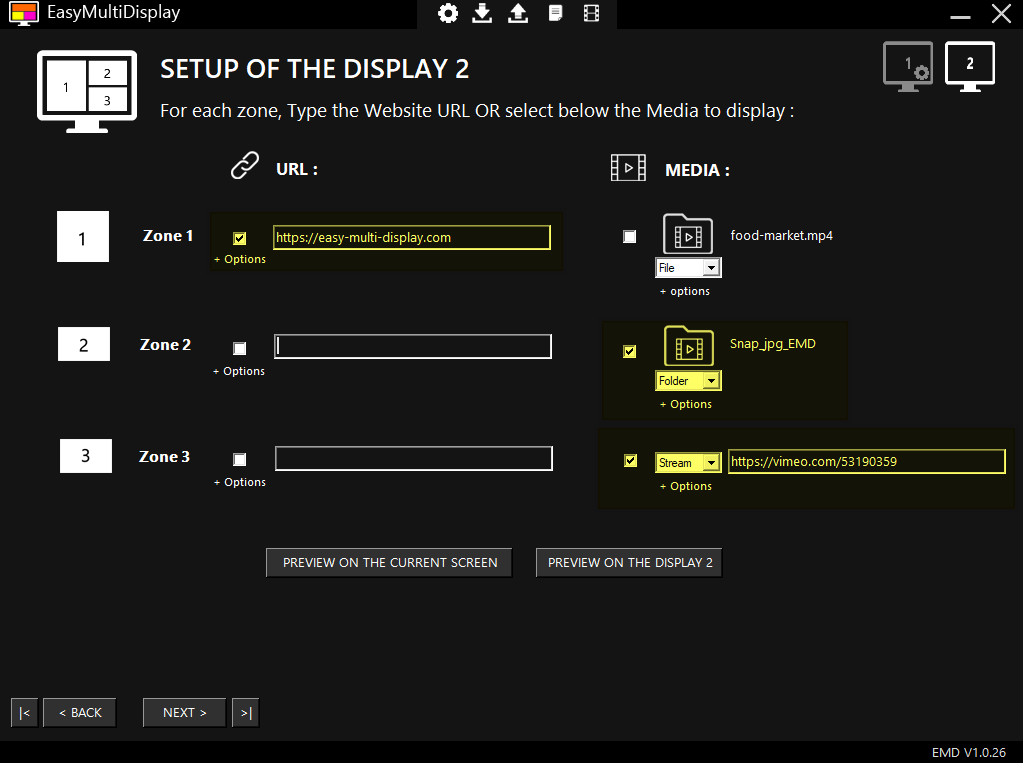
Now you can define what you would like to display on Display 2. You can choose either a URL, OR media for each zone. Once you’re happy with your configuration, click Next.
In this example, I have chosen to display a website in zone 1, a folder of videos in Zone 2, and to stream a video from Vimeo in Zone 3. You can choose any configuration you like!
STEP 6
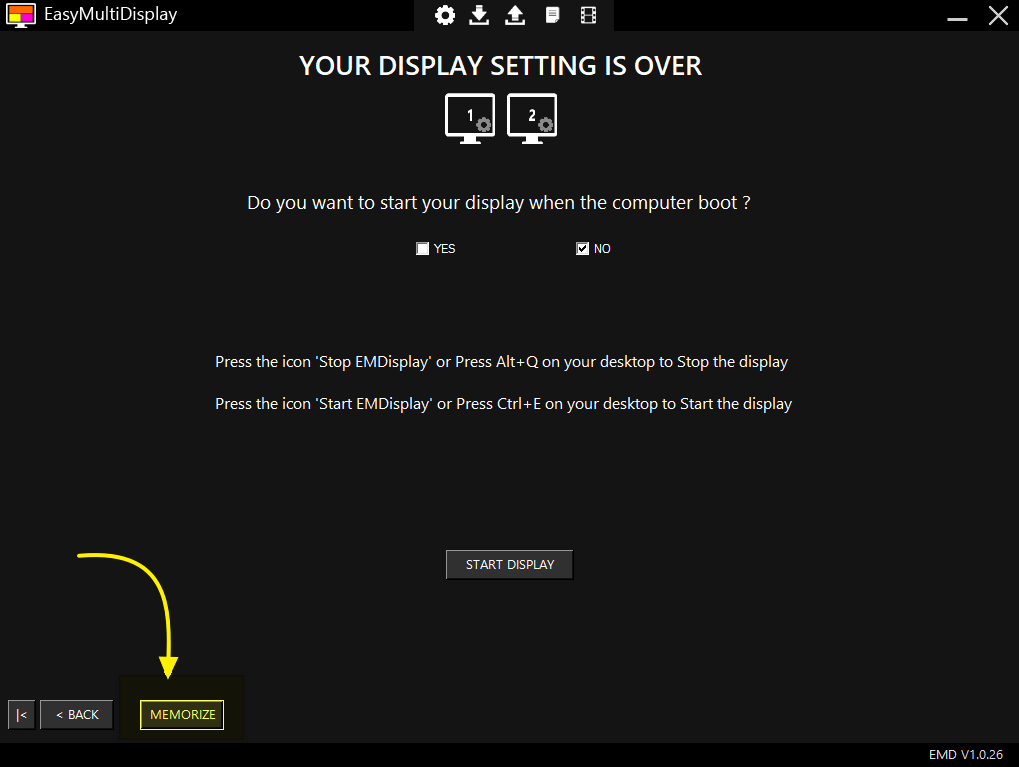
Once you have configured all your displays, I recommend that you click on Memorize to save your configuration for next time you launch Easy Multi Display.
Now that you have setup your displays, you can click on Start Display!
Do you still have problems?
If you still have questions or problems with your display or your setting, don’t hesitate to visit our F.A.Q, download our user guide or contact our customer service at support@easymultidisplay.com. We will be happy to help you and we would be delighted to hear your opinion!
Download our software
If you are interested in our Easy Multi Display software, click here to download our trial version.
Some articles that we like and you will like!
McDonald’s franchisee boosts engagement with digital signage

Logo of Easy Multi Display

