How Can We Help?
How to get the video stream from your display?
In this article, we will explain to you how to get the video stream from your display. You can easily retrieve the video stream from your display on your network or from the internet with a fixed ip. If you want to know more about Easy Multi Display, don't hesitate to consult our other guides in the FAQ part of our website.
From the PC that displays your media on your videowall, open the EMD Remote then click on the Screen Recorder settings, set the video options, check the "With Stream" and "Only stream" boxes (otherwise you need a very good PC) then specify the Destination IP and the UDP port and finally launch the broadcast by clicking on "REC.
For the PC that will display the video stream (possible with Mac/Android/Ios) :
Use the software Media Player Classic MPC it is located in the "Logiciels" folder in the EMD installation folder
or you can download for free :
https://mpc-hc.org/, the most recent software files can be found here : https://github.com/clsid2/mpc-hc/releases
MPC-HC is an extremely light-weight, open source media player for Windows®. It supports all common video and audio file formats available for playback. We are 100% spyware free, there are no advertisements or toolbars.
As in the video, for use on a local network, indicate the IP of the destination PC, e.g. 192.168.1.22 and a UDP port of 1234.
*On the local machine, open MPC and indicate in the file: udp://192.168.1.22:1234 and click on Play, wait a few seconds and you can monitor your remote screen wall.
*On a machine on a remote network, open the UDP port on its modem:
For example on a Neufbox or SFRBox you will need to :
1. Open a browser and go to 192.168.1.1.
2. Connect using your login details (usually id: admin and mdp: admin)
3. Go to "Network" and then to "NAT".
4. Enter the necessary information (Port, protocol...)
5. Click on validate and that's it
And assign your remote PC a fixed IP address, also called public address, from your ISP or/and with the help of this type of tools Dyndns and No-IP.
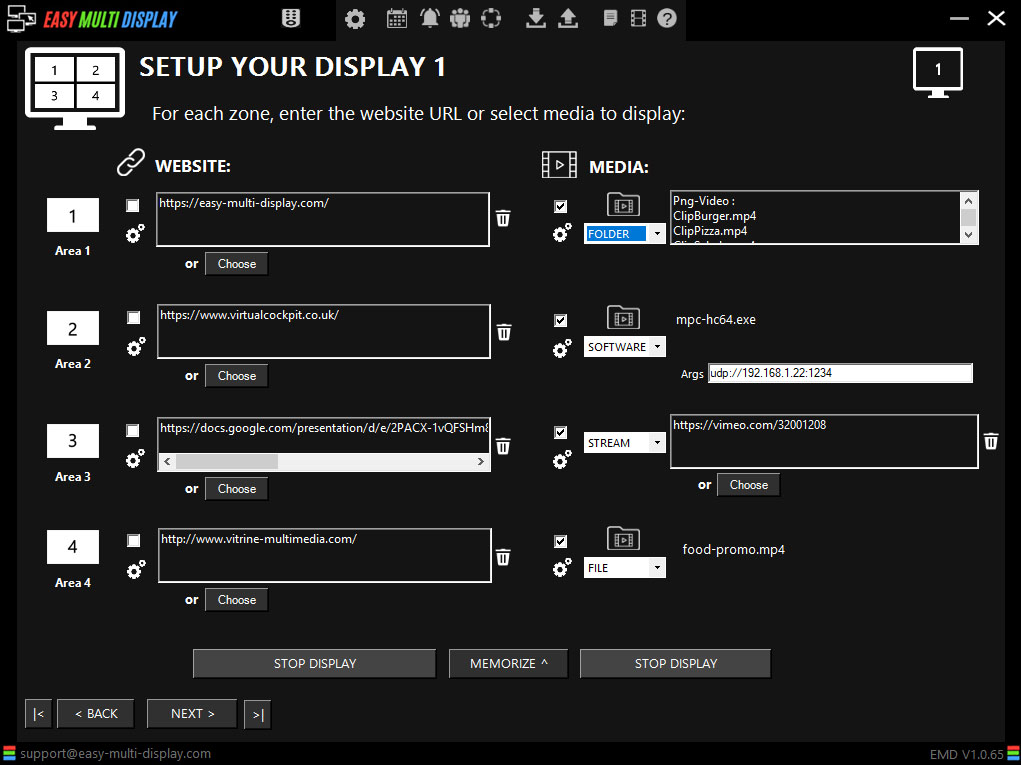
You can also use the "software" function in EMD's "SETUP YOUR DISPLAY" slide to integrate video streams, select the mpc-hc64.exe player in its installation folder and indicate as argument udp://id address:UDP port.

Commands
CMD for MPC : udp://192.168.1.22:1234 /play /viewpreset 1
Utilisation : mpc-hc.exe "chemin du fichier" [options]
"chemin du fichier" Fichier principal ou répertoire à charger (jokers
autorisés, "-" désigne l'entrée standard)
/dub "fichier audio" Charge un fichier audio supplémentaire
/dubdelay "fichier" Charge un fichier audio avec décalage de XXms
(si le nom contient "...DELAY XXms...")
/d3dfs Lance l'affichage en mode plein écran D3D (réduit le "tearing")
/sub "fichier ST" Charge un fichier de sous-titres
/filter "nom" Charge un filtre DirectShow à partir d'une DLL
(jokers autorisés)
/dvd Démarre en mode DVD (il est possible de fournir le
nom du répertoire)
/dvdpos T#C Démarre la lecture du titre T, à partir du chapitre C
/dvdpos T#P⇥Démarrer la lecture du titre T, à partir de la position P (hh:mm:ss)
/cd Charge toutes les pistes d'un CD audio ou d'un (S)VCD
(il est possible de fournir le chemin du lecteur)
/device Ouvre le périphérique de capture vidéo par défaut
/open Ouvre le fichier et met MPC-HC en pause
/play Ouvre le fichier et commence la lecture
/close Quitte automatiquement après la lecture
(fonctionne uniquement si utilisé avec /play)
/shutdown Éteint la machine après la lecture
/standby Met la machine en veille après la lecture
/hibernate Met la machine en veille prolongée après la lecture
/logoff Déconnecte la session après la lecture
/lock Verrouille la session après la lecture
/monitoroff Éteint l'écran après la lecture
/playnext Ouvre le fichier suivant dans le répertoire après la lecture
/fullscreen Démarre en plein écran
/viewpreset N Démarre avec un pré-réglage particulier,
où N est soit "1" Minimal, "2" Compact ou "3" Normal
/minimized Démarre en mode minimisé
/new Démarre une nouvelle instance de MPC-HC
/add Ajoute un fichier à la playlist, peut être combiné avec /open et /play
/randomize Trie aléatoirement la liste de lecture
/volume N Règle le Volume, avec N compris entre 1 et 100
/regvid Associe les formats vidéo à MPC-HC
/regaud Associe les formats audio à MPC-HC
/regpl Associe les listes de lecture à MPC-HC
/regall Associe tous les fichiers supportés à MPC-HC
/unregall Supprime l'association des fichiers à MPC-HC
/start ms Démarre la lecture à "ms" (millisecondes)
/startpos hh:mm:ss Start playing at position hh:mm:ss
/fixedsize L,H Fixe la taille de la fenêtre vidéo à LxH
/monitor N Démarre MPC-HC sur l'écran N, où N commence à 1
/audiorenderer N Utiliser le moteur de rendu audio N, où N commence à 1
(cf. "Sortie audio" dans les options)
/shaderpreset "Pr" Utiliser la présélection d'effets vidéo "Pr"
/pns "nom" Spécifie la présélection "Pan & Scan" à utiliser
/iconsassoc Réassocie les icônes spécifiques aux formats
/nofocus Démarre MPC-HC en arrière-plan
/webport N Démarre l'interface web sur le port spécifié
/debug Affiche des informations de débogage via l'OSD
/nocrashreporter Désactive le rapporteur de plantage
/slave "hWnd" Démarre MPC-HC en mode "esclave"
/hwgpu "N" Fixe le numéro du GPU utilisé pour le décodage matériel
Disponible uniquement pour CUVID et DXVA2 (copy-back)
/reset Restaure les paramètres par défaut
/mute Coupe le son
/help /h /? Affiche l'aide pour les options de la ligne de commande

